
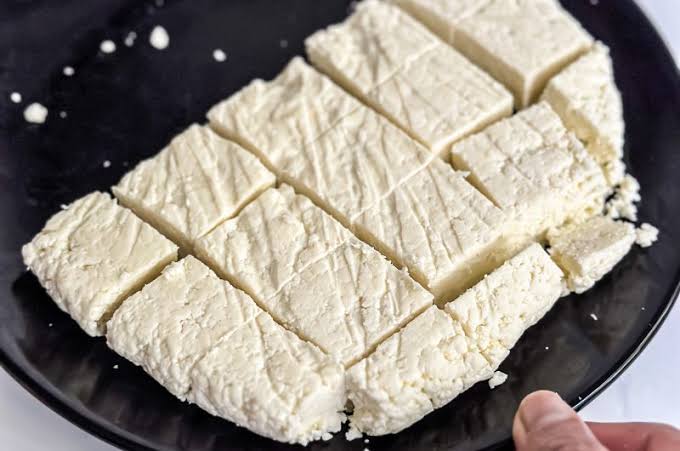
Paneer, also known as Indian cottage cheese, is one of the most versatile and beloved ingredients in Indian cuisine. It is used in a variety of dishes, including Paneer Butter Masala, Palak Paneer, Shahi Paneer, Paneer Bhurji, and tikka recipes. While store-bought paneer is convenient, homemade paneer is often fresher, softer, and free from preservatives. However, many people struggle with making paneer because the milk sometimes curdles unevenly, resulting in a grainy or crumbly texture.
The key to making soft, smooth paneer is controlling the curdling process carefully. By using the right ingredients and techniques, you can prepare restaurant-quality paneer at home with ease.
Ingredients
To make approximately 200–250 grams of paneer, you will need:
- 2 liters of full-fat milk
- 2–3 tablespoons of lemon juice or white vinegar
- 2–3 tablespoons of water (to dilute the lemon juice or vinegar)
- Ice cubes or cold water
- A muslin cloth or cheesecloth
- A strainer
Using full-fat milk gives a richer and creamier paneer compared to low-fat milk.
Step 1: Choose Fresh Full-Fat Milk
The quality of paneer depends largely on the milk you use.
For the best results:
- Use fresh full-cream milk.
- Avoid ultra-high temperature (UHT) milk if possible.
- Do not use spoiled or sour milk.
Full-fat milk produces a higher yield and a softer texture.
Step 2: Heat the Milk Properly
Pour the milk into a heavy-bottomed pot and heat it over medium flame.
Stir occasionally to prevent the milk from sticking to the bottom.
Bring the milk to a gentle boil, but avoid prolonged boiling, as this may affect the texture of the paneer.
Once the milk begins to rise, reduce the heat to low.
Step 3: Dilute the Acid
Instead of adding concentrated lemon juice or vinegar directly to the milk, mix it with a little water first.
Diluting the acid allows the milk to curdle gradually and evenly, helping produce smooth, soft curds rather than small, grainy ones.
Step 4: Add the Acid Slowly
This is the most important step.
Add the diluted lemon juice or vinegar gradually while gently stirring the milk.
Do not pour all the acid at once.
Continue stirring slowly until the milk separates into:
- White curds
- Clear greenish whey
Stop adding acid as soon as the separation is complete.
Adding too much acid can make the paneer hard, sour, and crumbly.
Step 5: Prevent Over-Curdling
Once the milk has completely separated, immediately switch off the heat.
Overheating after curdling causes the curds to become tough.
To stop the cooking process, add a few ice cubes or pour in cold water.
This helps preserve the softness of the paneer.
Step 6: Strain the Curds
Place a muslin cloth or cheesecloth over a strainer.
Carefully pour the curdled mixture into the cloth.
The whey will drain away while the paneer remains in the cloth.
You can save the whey for making dough, soups, or smoothies instead of discarding it.
Step 7: Wash the Paneer
Rinse the paneer under clean cold running water.
This serves two purposes:
- Removes the sour taste of lemon or vinegar.
- Helps cool the curds quickly, preventing further cooking.
This step is especially important if you’re using vinegar.
Step 8: Remove Excess Water
Gather the cloth and gently squeeze out the extra water.
Avoid squeezing too hard, as this can make the paneer dry and crumbly.
The goal is to remove excess moisture while keeping the curds soft.
Step 9: Shape the Paneer
Place the wrapped paneer on a flat plate.
Fold the cloth neatly around it and place a flat object on top.
Add a moderate weight, such as a heavy pan or a water-filled container.
Press for about 30–45 minutes.
For softer paneer, use lighter pressure.
For firmer paneer suitable for grilling or frying, press slightly longer.
Step 10: Cut and Store
After pressing, unwrap the paneer and cut it into cubes.
If not using immediately, place the paneer in a container filled with clean water and refrigerate.
This helps keep it moist and fresh for up to 2–3 days.
Common Mistakes to Avoid
To make perfect homemade paneer, avoid these common errors:
- Using low-fat milk.
- Adding too much lemon juice or vinegar.
- Boiling the milk for too long after curdling.
- Stirring too vigorously.
- Pressing with excessive weight.
- Skipping the cold-water rinse.
These mistakes can result in paneer that is dry, rubbery, or crumbly.
Tips for Extra Soft Paneer
For consistently soft homemade paneer:
- Always use fresh full-fat milk.
- Add the acid slowly.
- Stop heating as soon as the whey separates.
- Cool the curds immediately.
- Press gently rather than heavily.
- Store paneer submerged in water until ready to use.
If you plan to add the paneer to curries, soak the cubes in warm water for 10–15 minutes before cooking. This helps restore moisture and keeps the paneer tender.
Health Benefits of Homemade Paneer
Homemade paneer is not only delicious but also highly nutritious. It is a good source of high-quality protein, calcium, phosphorus, and vitamin B12. Since you control the ingredients, homemade paneer contains no added preservatives or artificial flavors. It is an excellent choice for vegetarians and can be included in a balanced diet to support bone health, muscle maintenance, and overall nutrition.
Conclusion
Making paneer at home without ending up with hard or crumbly curds is simple once you understand the process. The secret lies in using fresh full-fat milk, adding diluted acid gradually, stopping the cooking process immediately after curdling, and pressing the curds gently. With these easy techniques, you can prepare soft, creamy, and fresh paneer that tastes far better than many store-bought varieties. Whether you’re making a rich curry, a healthy salad, or grilled paneer snacks, homemade paneer adds freshness, flavor, and quality to every meal.